Table Of Contents
Preparing for Installation
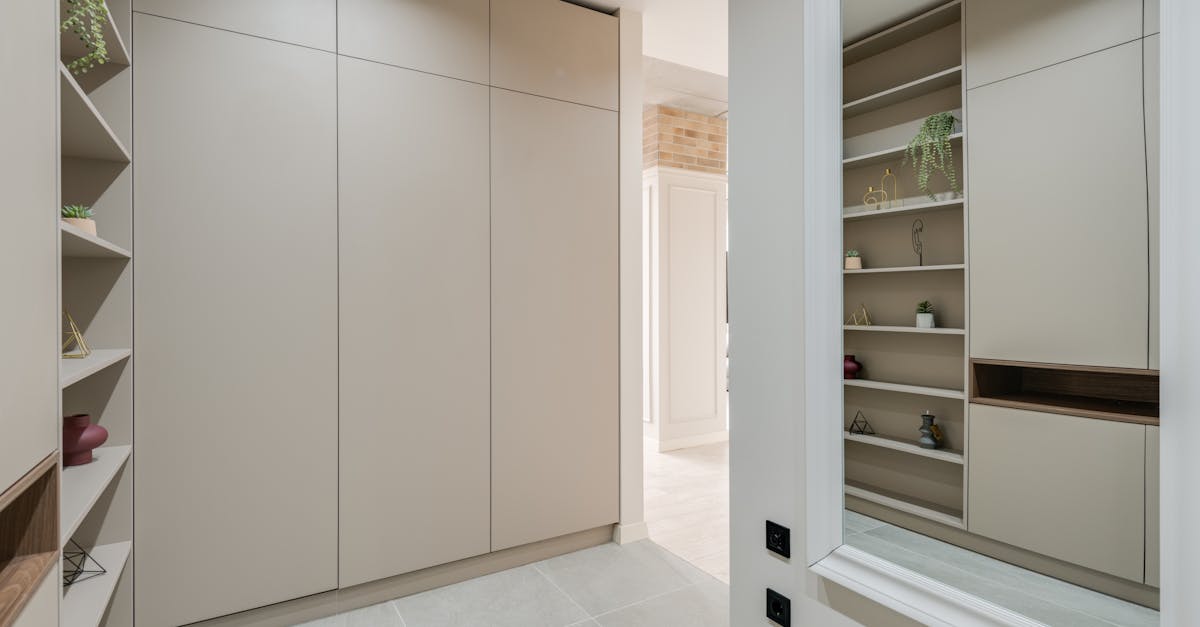
Preparing for the installation of built-in wardrobes requires careful planning and organisation. Begin by measuring the space where the wardrobe will be located. Take accurate dimensions to ensure that the wardrobe fits perfectly within the designated area. Consider the height, width and depth to make informed decisions about design and functionality. It is also wise to think about the layout and how it will integrate with the room's overall aesthetics.
Clearing the area is a crucial step in preparing for installation. Move any furniture, decorative items or obstacles from the vicinity. This creates a safe workspace for the installers and allows them to work efficiently. If possible, remove any existing wardrobe or storage systems that may obstruct the installation process. Having a clean and accessible space helps ensure a smoother experience and allows for any necessary adjustments during the installation of your built-in wardrobes.
Clearing the Area and Making Room
Before commencing the installation of built-in wardrobes, it's vital to clear the area where the wardrobes will be placed. Move any furniture, decorative items, or personal belongings from the designated space. This ensures that the installation team has unobstructed access to the walls and floor, allowing for a smooth setup process. Additionally, emptying the area reduces the risk of damage to your belongings during the installation.
Once the space is cleared, take a moment to assess the room for any potential obstacles. Check for protruding fixtures, electrical outlets, or plumbing that may interfere with the built-in wardrobes' installation. It's also wise to consider the layout of the room to ensure a seamless integration of the wardrobes with existing furniture. A well-prepared space contributes significantly to a hassle-free installation experience.
The Installation Process
The installation of built-in wardrobes typically begins with assembling the necessary components. This can include the frame, shelves, and door mechanisms. Carefully following the manufacturer’s instructions ensures that each part is correctly placed. It helps to have all tools ready before starting the installation to avoid delays. Precise measurements must be double-checked to fit the wardrobe perfectly into the allocated space.
Once the frame is securely installed, shelves and other internal fittings can be added. This step may require additional reinforcement to support heavier items placed inside. After securing all components, doors can be fitted, ensuring they open and close smoothly. A final inspection checks for any adjustments needed, ensuring that everything functions as intended. With the correct installation process, built-in wardrobes can enhance both the aesthetic and practical aspects of any room.
Step-by-Step Breakdown of the Installation
The installation of built-in wardrobes begins with a thorough assessment of the area. Measurements are taken to ensure a perfect fit within the allocated space. It is important to double-check the dimensions before moving forward. Once the measurements are confirmed, the installation team can prepare the necessary materials and tools. Pre-assembled components are often preferred as they streamline the overall process and minimise on-site construction time.
Next, the installation involves securing the frame to the wall. This ensures stability and prevents any movement over time. Each section of the wardrobe is carefully fitted together, allowing for the smooth integration of shelves and hanging rods. Attention to detail is crucial at this stage as adjustments may be needed to align everything perfectly. Once assembled, a final inspection confirms that the built-in wardrobes meet quality standards and the design specifications.
Post-Installation Care
Once the installation of your built-in wardrobes is complete, it is essential to take proper care to ensure their longevity and functionality. Start by avoiding placing heavy items on the shelves too soon, as this can lead to warping or damage. Instead, give the materials time to settle and adapt. Regularly check for any signs of wear or loose fittings. Addressing minor issues promptly can prevent more significant problems down the line.
Cleaning your built-in wardrobes should be part of your routine maintenance. Use a soft, damp cloth to wipe down surfaces, avoiding harsh chemicals that could compromise the finish. Pay attention to the hinges and tracks of sliding doors, as dust accumulation can affect their performance. Keeping these areas clean will help maintain the smooth operation of your built-in wardrobes, ensuring they remain a functional and attractive feature in your home.
Maintaining Your Built-in Wardrobe
Maintaining your built-in wardrobes is crucial for ensuring their longevity and functionality. Regularly check for dust and dirt accumulation on surfaces and inside compartments. Use a soft cloth and mild cleaning solutions to wipe down all areas, including the shelves and hanging rods. Avoid abrasive cleaners that could damage the finish. Periodic inspections for signs of wear or damage will help you address potential issues before they become significant problems.
Proper organisation inside your built-in wardrobes can also enhance their usability. Group similar items together and utilise storage boxes for smaller articles to maximise space. Consider using hangers that suit the type of clothing stored to maintain shape and appearance. Additionally, ensure that the wardrobe’s ventilation is adequate to prevent mustiness, particularly in humid environments. This level of care will keep your built-in wardrobes looking great and serving you well for years to come.
FAQS
What should I do to prepare my space before the installation of a built-in wardrobe?
To prepare your space, you should clear the area where the wardrobe will be installed, ensuring there is enough room for the installers to work. Remove any furniture or items that may obstruct the installation process.
How long does the built-in wardrobe installation process typically take?
The installation process can vary depending on the complexity and size of the wardrobe, but it generally takes anywhere from a few hours to a full day to complete.
Do I need to be home during the installation of my built-in wardrobe?
While it is not necessary for you to be home during the installation, it is recommended so you can discuss any specific preferences or address any questions the installers might have about the process.
How do I maintain my built-in wardrobe after installation?
To maintain your built-in wardrobe, regularly clean the surfaces with appropriate cleaners, keep the interior organised, and check for any signs of wear or damage. This will help prolong its lifespan and keep it looking its best.
Can I customise my built-in wardrobe design?
Yes, most built-in wardrobe providers offer a range of customisation options, allowing you to choose the size, layout, materials, and finishes that best suit your style and storage needs.